Hello there!
I admit I am a little bit late for this kind of post, but I really wanted to share it with you. I found out that I am having some children over for Easter's dinner and I wanted to surprise them with a cute gift but I wanted it to be fun and cute for them too. So I realized I would create two customized buckets - one for the little girl and one for the boy. It took only 10 mins to put everything together and I really love them. I hope you enjoy this video and I hope I gave you some ideas for your gift - if you are a person that leaves everything for the last minute like I do.
Hello my lovely friends! Today I have an easy and inexpensive DIY for you. I recently bought a new set of brushes and OMG - every time I start doing my makeup the whole place turns into a mess. There are so many brushes and it became very difficult to open and close their pouch every time I needed a specific brush. This is why I decided to go at the Dollar Store and buy a couple of things that will help me create something cute and useful.
Things you will need:
2 candle holders = $2
2 glass vases (I chose one squared and one circled) = $2
glue gun or any other strong glue you might have at home
salt, I am sure you have salt in your kitchen but I suggest to buy some more in case you chose to do this version = $1
big fat colorful chalks = the whole packet you see in the pictures costed $1
Pershendje mikeshat e mia! Sot dua te ndaj me ju "krijimin" tim te radhes. Para pak kohesh bleva nje set te ri me furca per makeup dhe ... O zot i madh sa rremuje e madhe behej sa here qe shkoja para pasqyres dhe filloja te lyhesha. Po behej gjithmone e me e veshtire te hapja dhe te mbyllja canten e tyre sa here qe me duhej nje furce e vecante. Nuk mund te vazhdoja me ashtu, keshtu qe bera nje vizite te shkurter tek Dollar Store, nje dyqan ku gjithcka eshte vetem $1. Bleva te gjitha materialet qe me duheshin per te krijuar dicka te lezetshme dhe praktike.
Materialet qe ju duhen:
2 mbajtese qiriri
2 vazo qelqi, une zgjodha nje te rrumbullaket dhe nje katrore
ngjites per qelq, une zgjodha te perdorja pistoleten e silikonit sepse me pelqen shume :)
kripe; edhe pse mund te kini kripe ne kuzhinen tuaj ju sugjeroj te blini pak me shume ne qofte se vendosni te beni kete version
shkumesa te medhenj me ngjyra
dhe pak fare durim ^-^
After you collect all these things it is time to start our DIY! :)
I keni te gjitha? Cfare prisni? Fillojme...
1. Apply glue on the top of the candle holder.
2. Apply glue on the bottom of the vase.
3. Stick them both together, press gently.
4,5. Repeat step 1 for the second candle holder.
6. Repeat step 2 for the second vase.
7. Stick the pieces together and press gently.
8. Let them dry.
9. Voila :)
Aplikoni ngjitesin ne pjesen e sipersme te mbajteses se qiririt dhe ne pjesen e poshtme te vazove. Bashkoni pjeset duke ushtruar pak force dhe prisni sa te thahen. :)
Now that you have your brush holders ready you will need something to fill them. If you don't do so the brushes will still be a mess and you will not be able to see them clearly, you will still struggle and you will still have a mess. You can choose anything to fill the holders with, a friend of mine uses coffee grains. I wanted something more girly, colorful and fun. This is why I chose salt and chalks.
1. Pure some salt on a container and start mixing it with the chalk. The salt will scratch the chalk and it will color.
2. Pure the colored salt in the brush holder.
3. Do the same thing with all the colors, layering them one by one until you have a rainbow :)
-----------------------------------------------------------------------------------------------------------------------------------------------------------------------------------
Tani qe i keni gati mbajteset tuaj duhet t'i mbushni me dicka ne menyre qe furcat mos qendrojne te lira dhe te jeni serish rremuje. Mund te zgjidhni shume gjera per te mbushur vazot, nje shoqja ime perdor kokrra kafeje. Une doja dicka shumengjyrese dhe pak me shume vajzerore, prandaj zgjodha kripen dhe shkumesat.
1. Hidni pak kripe nje taper plastik dhe filloni ta perzjeni me shkumesin. Kripa do te gervishte shkumesin dhe pas pak minutash do te marre ngjyren e shkumesit.
2. Hidhni kripen e ngjyrosur ne vazon tuaj.
3. Perserisni te njejten procedure me te gjitha ngjyrat dhe shtojini ne vazo shtrese pas shtrese duke krijuar nje ylber. :)
Put your brushes and voila! Here you have a nice brush holder and decoration too :)
Thank you for visiting me!
Shpresoj tju kete pelqyer!
Ju perqafoj,
Marjana :)
It is always important to be take care of your skin, spoil
it at least once a week and especially when you are about to go on a date. You
want look fresh, bright and beautiful even after a long day at work. Today I am
going to be showing you how I pamper myself before going out on a date. It
does not take too long, it is easy and really refreshing.
Face care
First I start by washing my face with my Neutrogena Oil-Free Acne Wash and after
that I prepare a quick and easy face mask using cocoa, egg and honey. This
really nourishes your face and makes it so smooth and bright.
To prepare this mask all you have to do is mix about a
tablespoon of cocoa with one egg and one teaspoon of honey. It smells wonderful
but I wouldn’t eat it. Then take some of the mixture in your fingers and start
applying it on your face. Let it set for about 15-20 min and meanwhile take
some selfies of yourself and send them to me if you don’t mind (I would love to
see them)
Crazyyyy
Body and Hair
After washing your face, you are ready for a nice and warm shower - if you have extra time you can have a relaxing bubble bath. I use my Victoria Secrets' 2-in-1 body wash and scrub with frozen apples and sparkling cassis.to scrub the dead skin and leaving my body refreshed and soft.
Last but not least, I wash my hair with my favorite ArganiCare shampoo and conditioner, to prepare it for the hairstyle.
While wondering around the house and waiting for hair to dry I apply my favorite body lotion form Bath and Body Works. This stuff smells AMAZING.
And then, it's time to do my make-up, style my hair and choose my outfit...
Hi guys! Today I come to you with another gift idea for V-day. It is as very inexpensive, easy and thoughtful as the last one. All you need is a plain mug, some sharpies and lots of candy, because who doesn't want candy on Valentine's Day?
Start by deciding what you want to write or draw on your mug. It does not have to be fancy, something really cute or just your favorite quote. I decided to write some reasons why I love my boy and then I drew this couple. As you see, you don't have to make the best painting ever, simple is good too :) After you have done drawing your art you have two options: 1) If you want your painting to be temporary, leave the mug as is but 2) if you want your painting to be permanent place the mug in the oven for 30 min in 350 degrees Fahrenheit. Then open the oven's door and leave the mug to cool off inside the oven. Last step: Fill it with lots of candy and chocolate :) I chose this mix bag from Walmart's and ...can we just talk about how cute the quotes are??? What?
Valentine's Day is just around the corner and I guess everybody is looking for some gift ideas, whether is for a friend or partner, single or couple.
Here is one very simple but thoughtful and personalized Do It Yourself present you can give to your significant other or just a best friend for Valentine's Day. The Memory Jar is basically a decorated jar where you put different notes of precious and beautiful moments you spent with the other person during a year. So, when you open it next year, you will see how happy you two have been.
Hello guys!
Today I wanted to share with you my DIY Journal. I like keeping a journal and writing on it cute moments I want to remember, ideas for posts or any thing else that helps me be organized everyday.
This year I wanted something really cute and personalized and I couldn't find a journal with all my requirements, so I decided to make my own. It turned out to be a very funny project and I really enjoyed playing with all the colors and designs.
I hope you like it too, and I hope it gives you an idea of how you want your journal to be.
Enjoy it!
Things you will need:
- Designed papers - I purchased these papers at Michael's and they were really inexpensive
- Notebook - I bought this one at the Dollar Store
- Duck tape of any design or color
- Double-sided tape - I also used spray glue but this is optional
- Scissors of any cutting tool
- Pencil and a ruler
Step 1: Chose you cover paper, fold it in half and cut it with your scissors. Apply the double-sided tape on all the corners of the paper and stick it to the notebook's cover.
Step 2: After you have glued the paper on both covers, front and back, it is time to use the duck tape and stick it at the corner of the book, just like the picture shows you.
At the end your book should look something like this...
Step 3: Cover the inside of your book. I am covering the inside of the notebook's original cover with a different paper and just lining the upper corner with a designed tape. Next I took the first two pages and glued them together leaving the vertical line not glued, so that it creates a small pocket, which I am going to use for storing my wishlist (because that list is Top Secret)
Step 4: I like to use sticky notes, page dividers and cute random stickers, so I thought to create some pockets to store them nice and organized.
Step 5: Start writing and enjoy your journal.
For more information and techniques on how to do this journal go watch my video on YouTube. It will help you a lot and you can see how I did everything.
Decorating the house for Christmas maybe really expensive but there are many ways to save your money and make your house look beautiful too. I am going to be posting some DIY Christmas decoration which are very easy to make and low on budget. Here is the first one
The second one is a Christmas-i plate. This project costs only $5 and looks very nice on your living room's table or wherever you want to put it.
Hope you enjoyed it and send me pictures if you try one of these.
Merry Christmas !
Love M
Christmas cannot be understood without the Christmas tree. I put up mine two week ago because I was excited of all the decoration going on everywhere. Here is how I made it look chubby.
1. I bought the tree, of course :P and I put all the branches on the floor in alphabetical order.
2. The secret of making your tree look just like the one on the box is working with the branches. Try to open them a lot (don't exaggerate ) in the most natural way possible.
3. Put all the branches one by one on their place.
and Ta-Daaaa
Now Decorate it the way you want :) Happy decorating :)
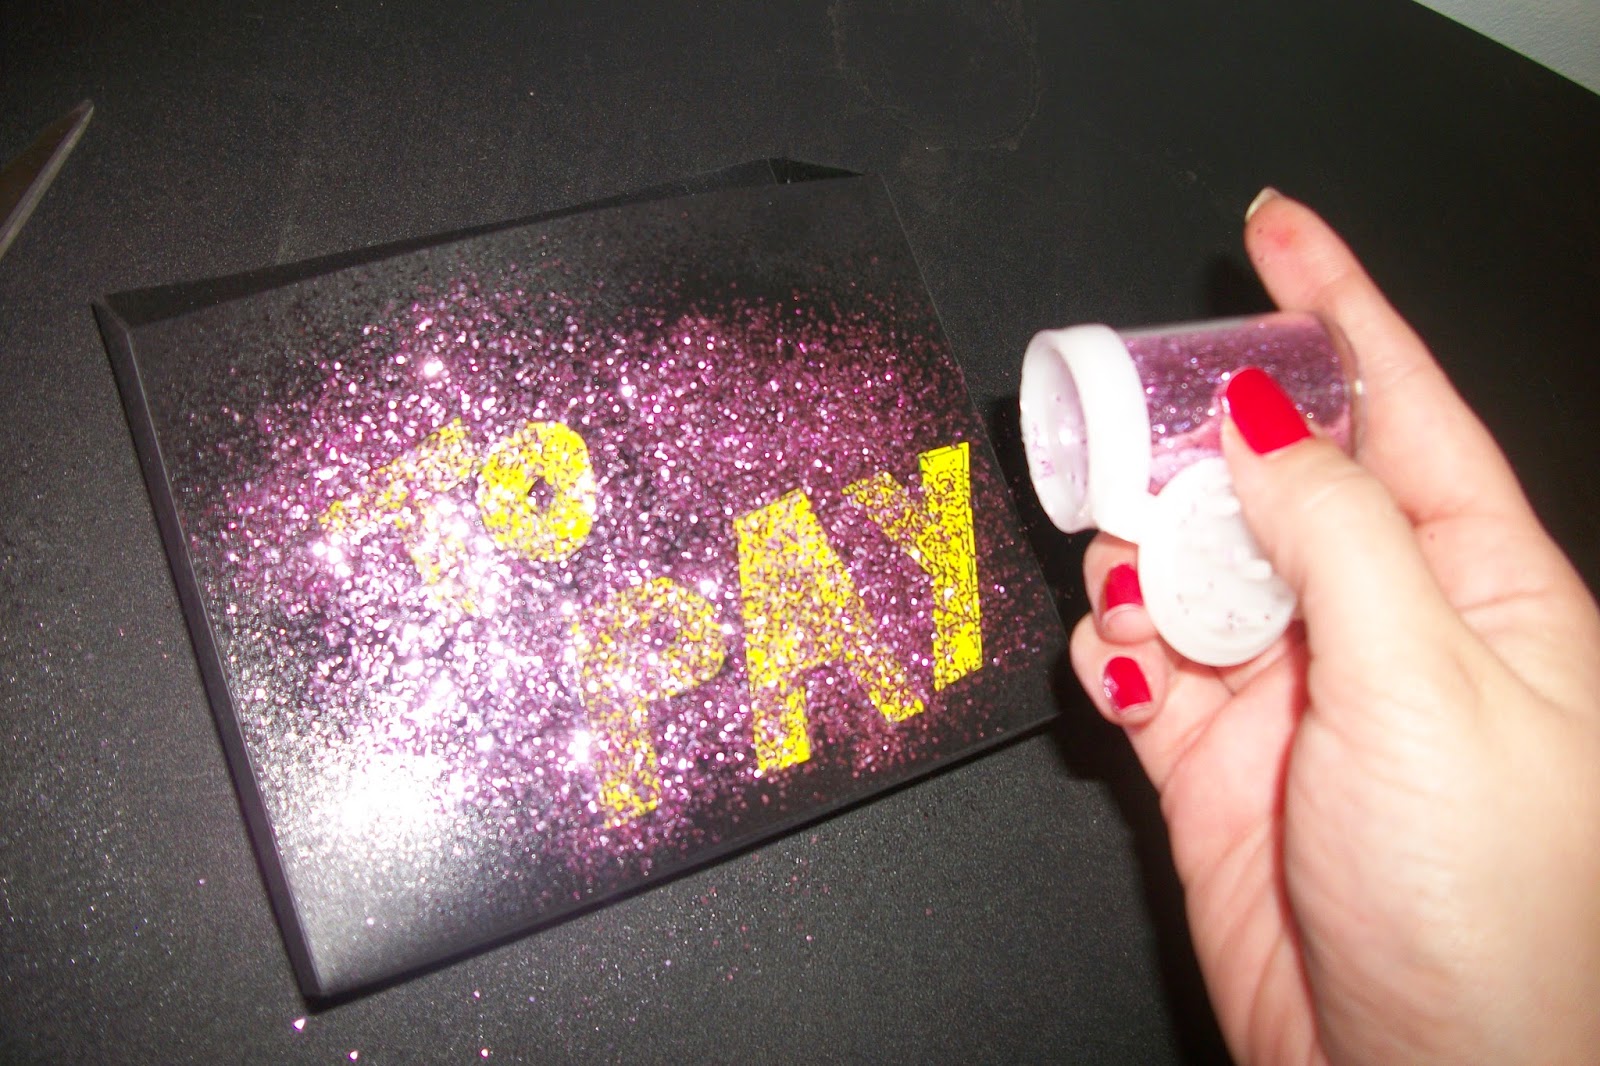
Lately me desk has been a mess with all those papers, so I had to reorganize them. And I also wanted to spice my desk a little bit so I came up with some cute ideas. Here is one you can use for storing and organizing all the papers or bills you have.
For this project you will need:
A plastic paper holder
Paper
Scissors
Glue Stick
Spray Glue
Glitters
Invisible nail polish (optional)
1. Decide what you want to write on your paper holder and cut the letters.
2. Stick the letters on the paper holder, Don't put too much glue because you will have to remove the letters later.
3. Then, spray the whole area with the Glue spray, and sprinkle your glitters.
4. Remove the letters and this is optional, but if you like, you can go over the glitters with some invisible nail polish to keep the glitters on their place.
Please let me know if you liked it. You can basically do this with different words and for different organizing areas. Send me pictures if you try it :)